
Retouched

The original photo
Shutter Speed 1/10, F 3.5, ISO 800

Retouched

The original photo
Shutter Speed 1/10, F 3.5, ISO 600
For the last of series posts, "How to take/edit food photography," I would like to go present with the way of showing before and after photos. I leave both the original photo and retouched one worked on LR and see how it gets done to finalize photo editing. Here, let me go through 3 tips of taking food photos outside.
Previous series posts
#1: How to take food photos at home (Dark Moody Look)
#2: How to take food photos at home (Whitish-blight look)
Set shutter speed and ISO right
It's so important to keep your attention to shutter speed and ISO on your camera. I know I edit photos later, and I could just focus on shooting. BUT I do not want to think "I can edit it later." So try to set up the shutter speed, and ISO proper to light up for an environment. It's a restaurant. There is no any way to set up flash-light next to food, and you don't want to bother other customers by flashing. Also, you better enjoy your quality time, which is eating(!). You quickly need to take shots before meals get cold. Setting up the proper shutter speed and ISO before the food is delivered, and when it comes to your table, you are ready to shoot.Add colors on food by color luminance tools
As showing my editing process on color luminance tool in a screenshot below, you get to know and focus what food should be featured. In this photo, apparently, chops. First, I adjusted "Red." After having the best color on the chops, I modified other colors to fit the tone of the chops over the whole meal presentation on the plate.Give the high amount of Sharpening as much as possible
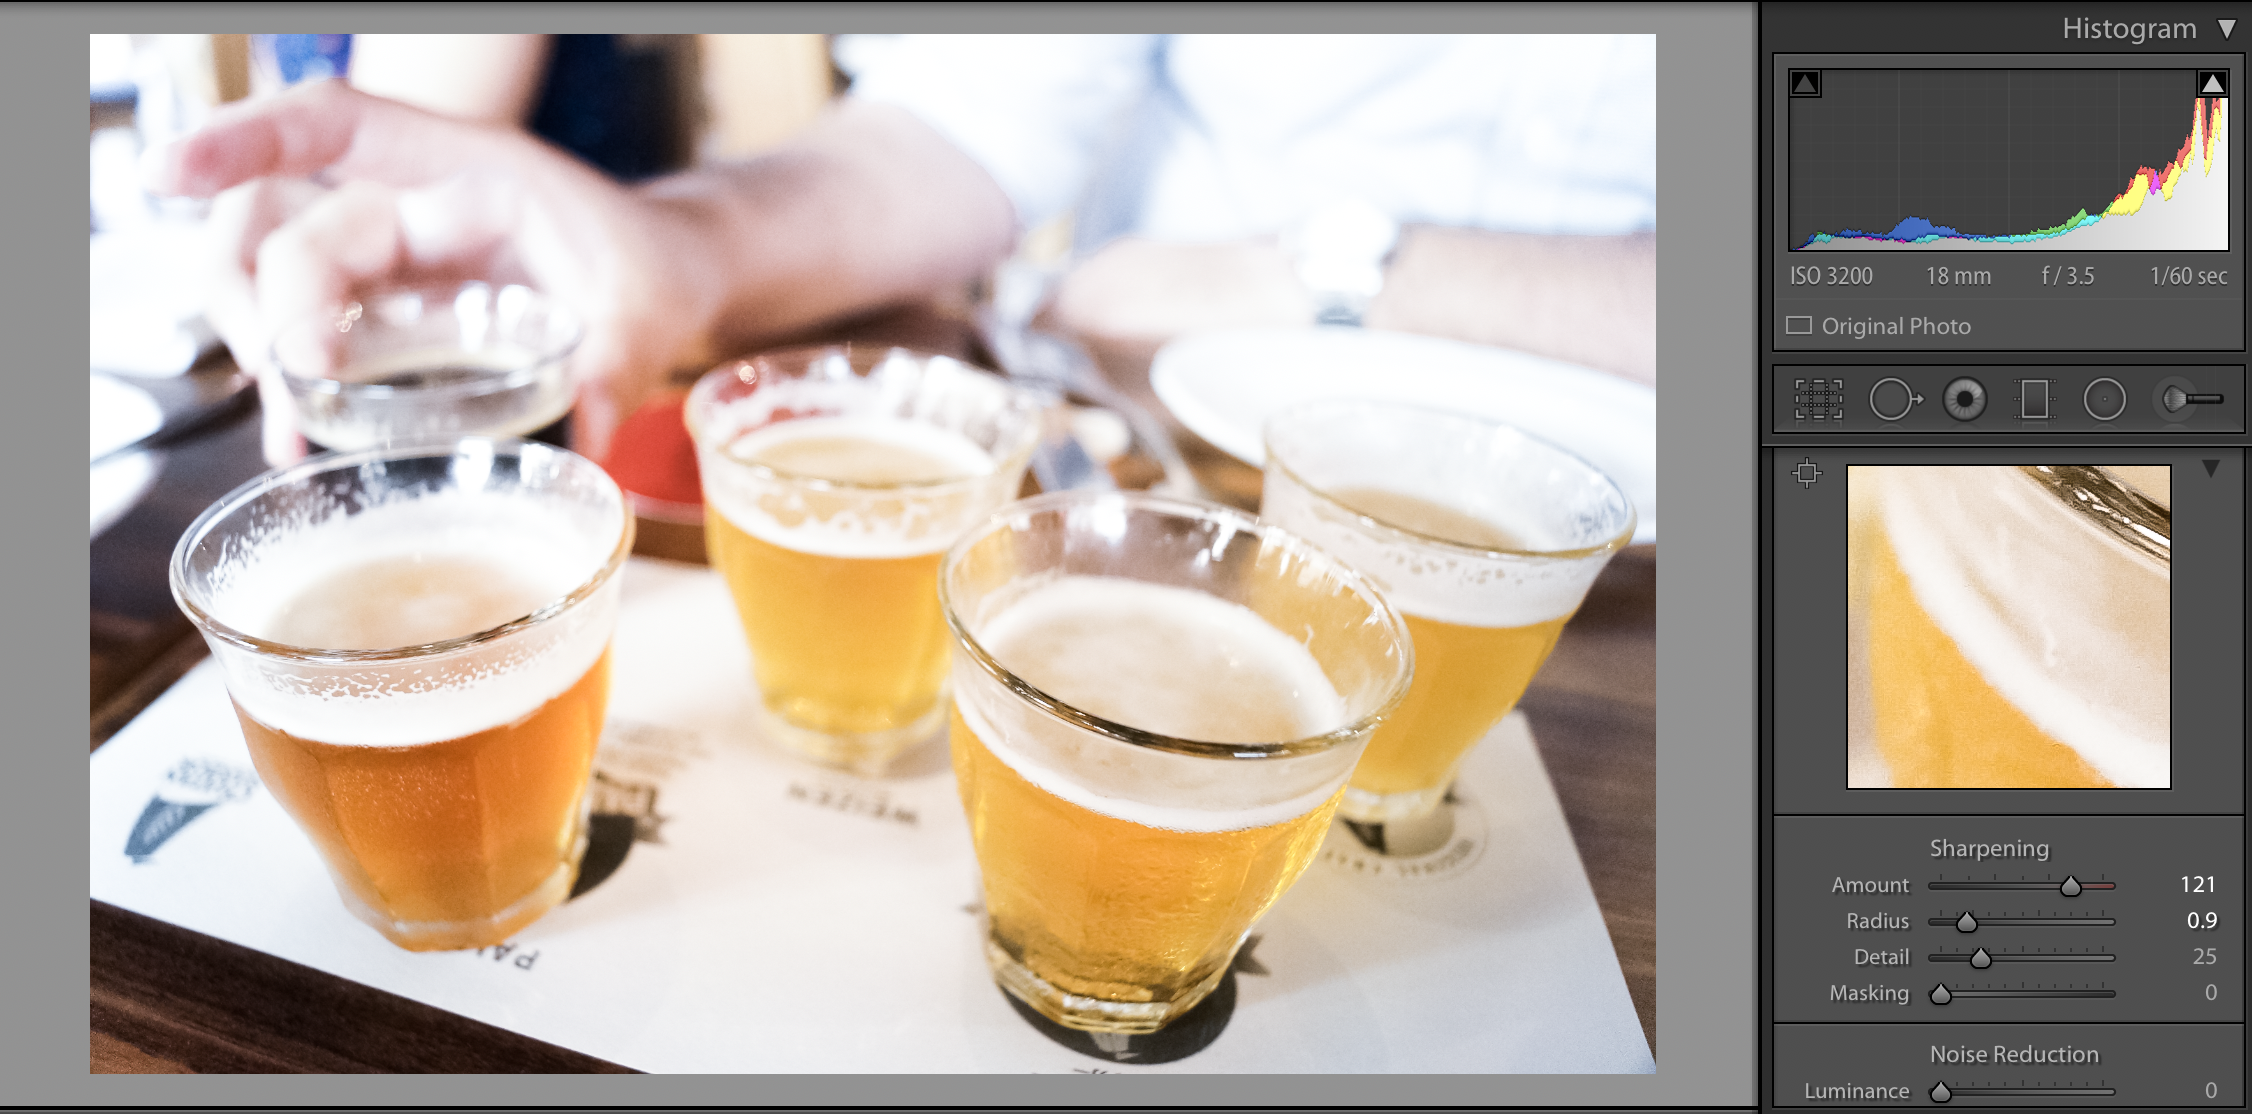
One more screenshot of editing behind the scene. Especially when it comes to beers, top bubble surface and the golden color of liquid that makes you gulp it should be emphasized on a photo. Adding the high amount of Sharpening gets it next level of food photo presentation to make audiences craving it.

#2 Tip: “Add colors on food by color luminance tools”
#3 Tip: “Give the high amount of Sharpening as much as possible”
Taking a food photo by your phone
Next. I would like to show how to take food photos by an iPhone. For the picture below, I use Snapseed to edit.
I like Snapseed because it has all adjustment tools it needs and is able to edit the whole parts on the phone. The app particularly provides excellent work for food photography. (I have used different apps, but this probably the best-qualified app concerning editing quality, control, and modification. )

The original
at Full Circle

Retouched
It's a slight change of brightness of the table, details of food, and contrast, however, that's a crucial part of photo editing, I think. This descent effort keeps you up with the pursuit of beauties on photos, such as better qualities, details, and brightness, that gives shiny parts of food presented in your quality time.
I think that’s it for the series of taking food photos. :) Hope you enjoyed and earned a little tips from the posts.
Thank you so much for reading.