
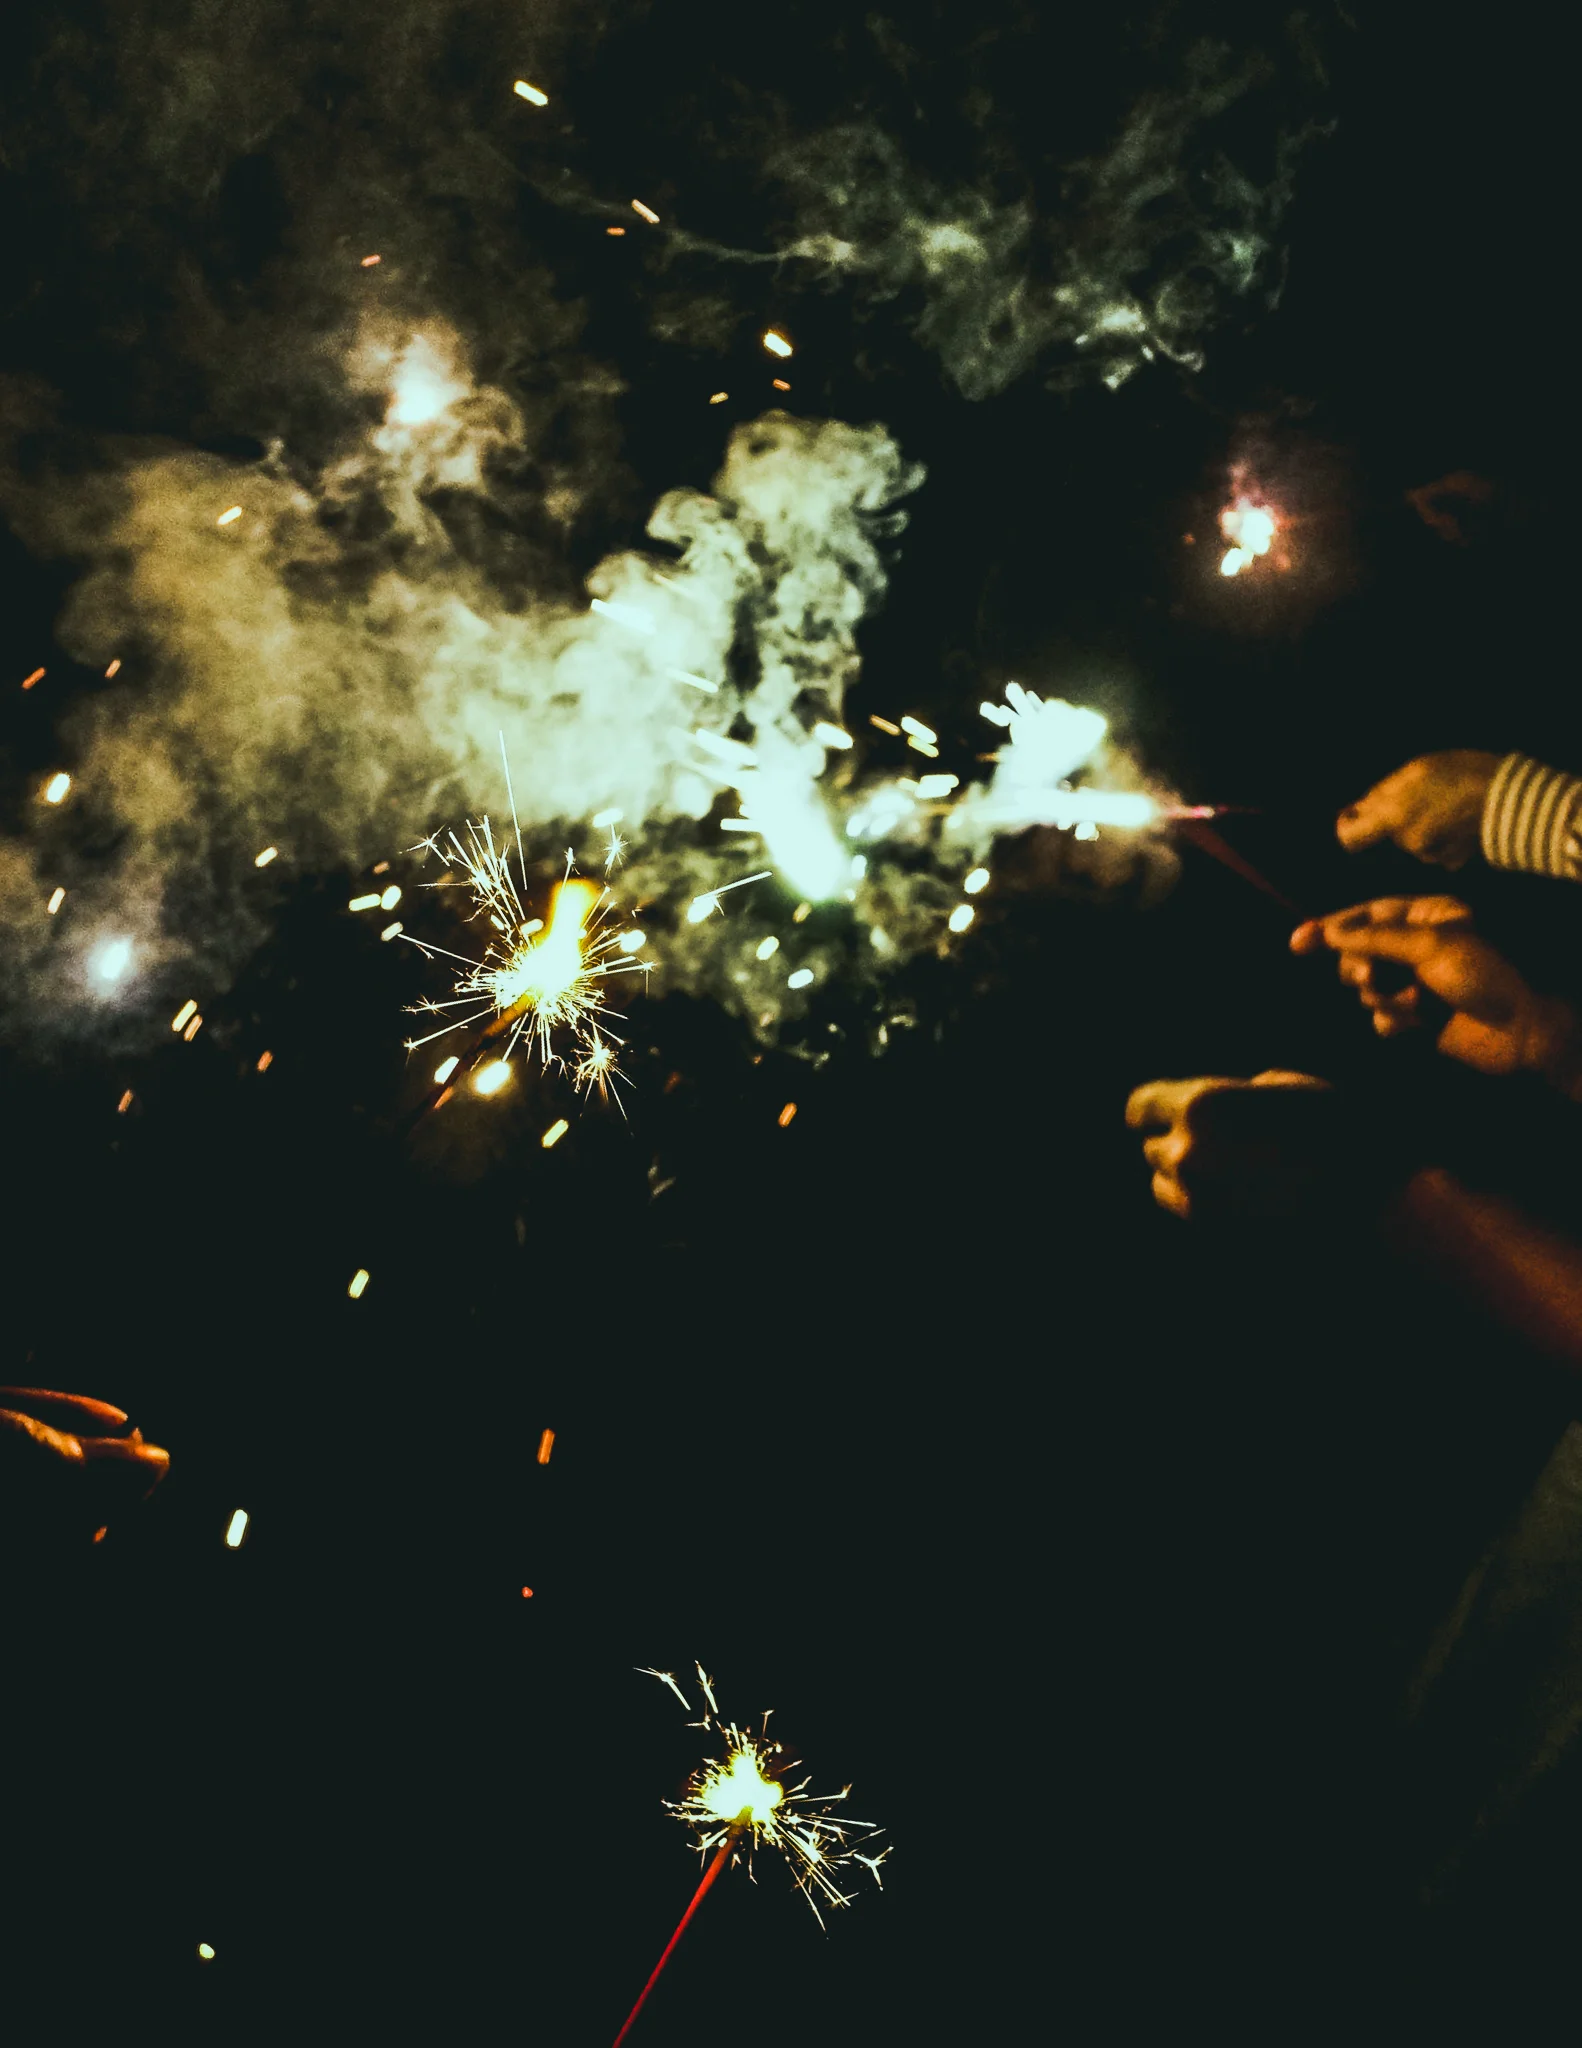
There is no reason not to do firework in October. Keep a fire going.
A little thing that makes life richer /

While I was working on editing for the project, she was preparing lunch.
This is my mom’s magic. She make everything significant if she wants, an old small table, flower/plants she picks up, and even a sashimi chirashi rice bowl from a supermarket.
Once she decorates them all together, our 1000 yen meal becomes a foodie’s lunch and photogenic.
From the daughter’s observation, making a table decoration and setting is effortless for her. She just enjoys it because that’s a part of her making life a little bit richer.


It's fall #3 -master the abnormal curve with the additional color curve- /
It is the final post of the series of ‘master the curve on LR.‘
In the first post, it presented the primary curve, and the second post was about the abnormal curve. In the final post here, I am going to show what I did on the fall look photos by adding the color to the curve.
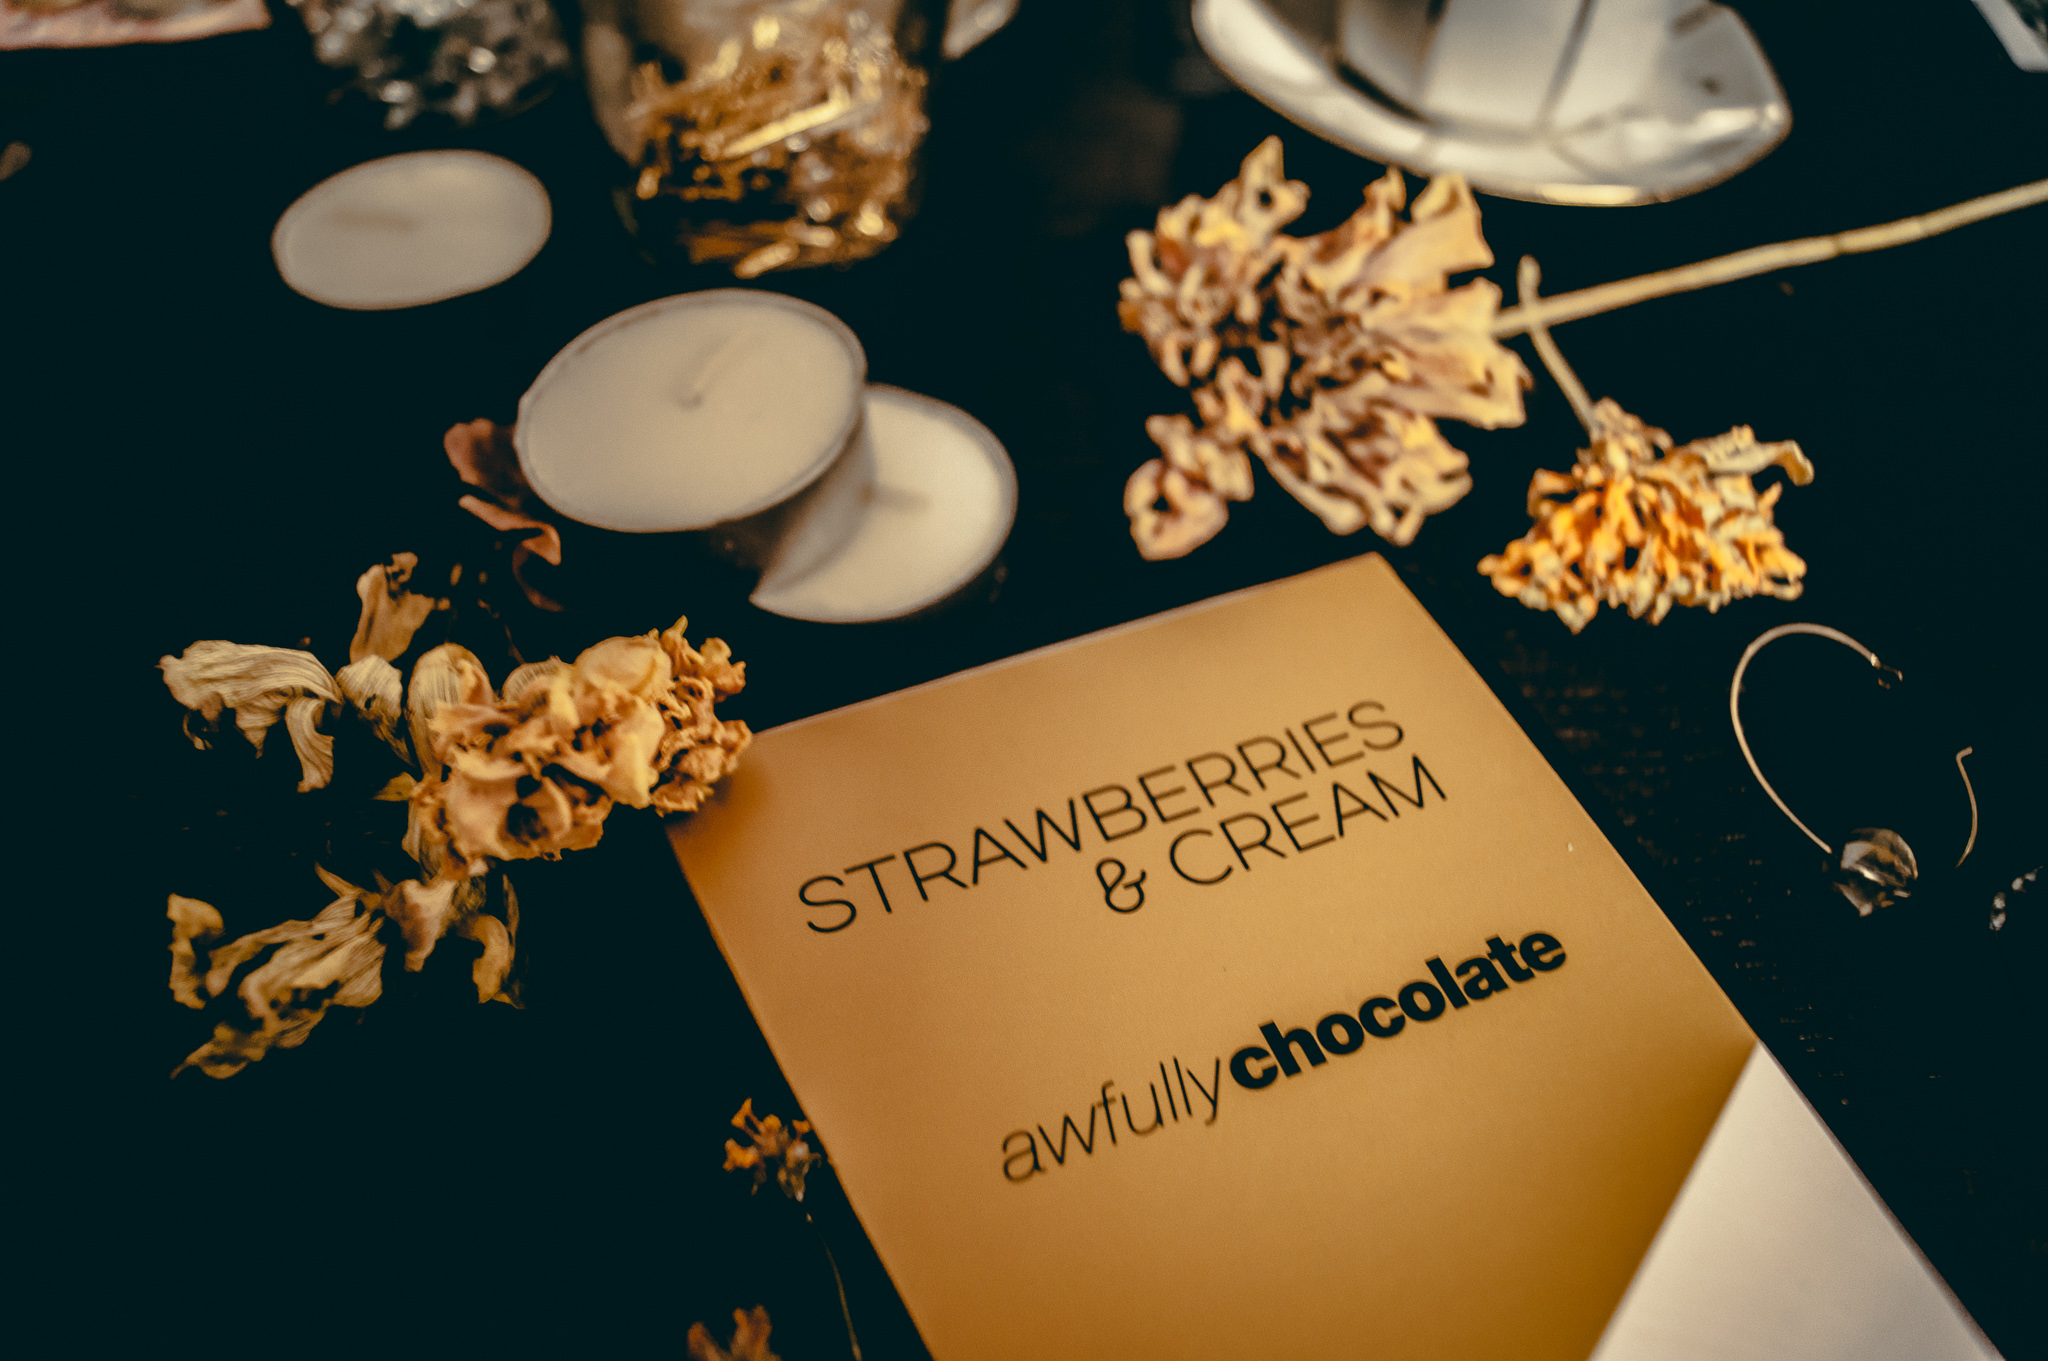
By the way, I took photos using in today's session at home. My friend got this chocolate from Awfully Chocolate from Singapore. (Thank you! It was delicious.) The package was very stylish, cute, and useful. Useful, why? I thought I could reuse the black package as a pencil case.
Let's see today's session, the curve graph.


The curve points were under the central y-axis to keep the photos as dark vintage look in a whole visual look. I don't go into details of the points here. Let me leave the curve graph to see.
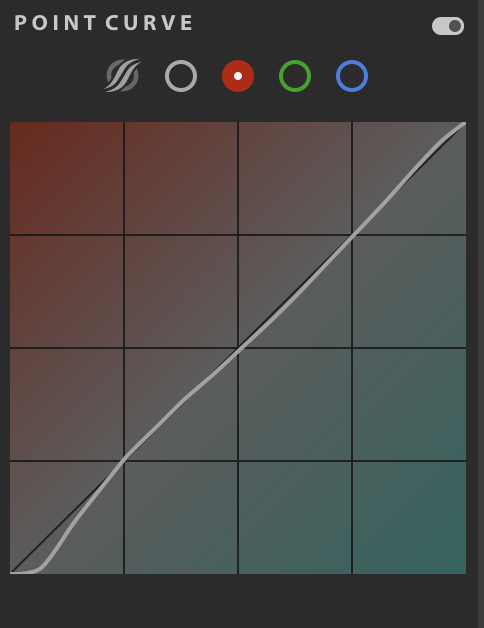
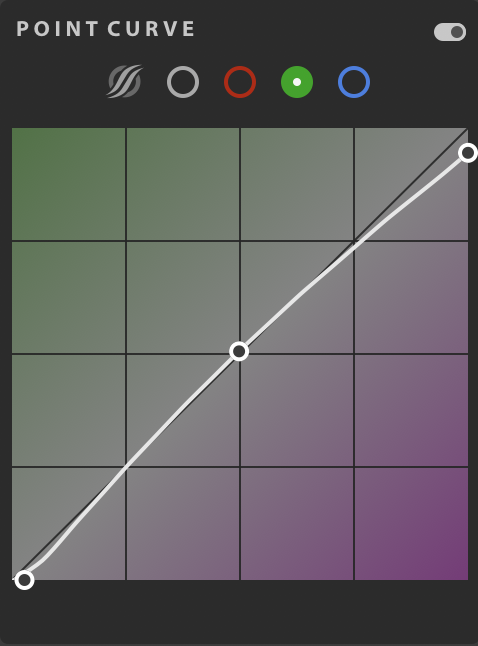

Please see the simple 3 concepts of abnormal curve plus color curves.
1. Color curves are based on RGB and control what type of vintage look you want to see. (Warm: Yellow and Red. Cool: Blue and Green)
2. Move the tip of points to vintage styles you are going with photos.
3. Keep the central point in the middle.
The basic curve is the key overall, so please check other posts (#1 and #2), but if you can control the RGB curves, photos drastically change to have more essences in your style and product images.
You don’t need to master all of curve series. It’s all for your preference and purpose of the photos.
Hope those tips in the series help your LR work :)
It's fall #2 -master the abnormal curve- /


In the previous post, I introduced the basic curve for still life photography. The critical part of it was the S curve hook to balance out brightness, contrast, and exposure. Today, it's a continued post, #2: Master the abnormal curve for still life photography.
I took those photos at the backyard of the flower shop, Flowers for Lena, a couple of weeks ago. Randomly pumpkins were left on the ground, and I felt this is the sense of the fall season starts.
For the curve session today, like last time, I leave the original photo in Raw and the point curve graph to show how I edited to make the fall mood on the photo.


As you see, the hook here is the not following the S curve hook theory. However, this curve also a format/form
This photo has a focus on objects, which are pumpkins, the background is dark, and there is no any particular thing to add the bright sense look. Therefore, I set each curve almost on the straight line to keep the moody look, not strong contrast or highlight. That emphasizes the fall pumpkins from the background.
On each point of curve lines, I left the ⇧ sign to see that the width of each end on the y-axis is getting to be narrow up to the top. Also, only in box #13, they have two points, which are a ‘starting point’ and ‘the second starting point.’ The role of the second starting point is to add vintage-polished essence by making the point be at the same y-axis level.
(By the way, the box #s are listed in the description of the first curve session. Please check.)
Beside that point, the curves do not interact with the center line. It's deviation from the standard straight line, even the S curve hook.

Let’s go review
1. Keep the points by the following format. (Almost no curving points)
2. Make the first starting point and the second starting point to polish the photo mood you want.
3. No interaction with the center line on the graph.
(*I made the ending point on the box #4 cross the center line to close the curve… but it’s not necessarily crossing the center line to conclude your curve.)
Ok, I think that's it for today.
Thank you for reading, and it will be the last post of the series, master the curve.
See you—
Break -October Playlist- /
Lena Del Rey has been my new muse because she is a floral embellished female as gorgeous as Jane Birkin is.
Noah Cyrus has this nostalgic voice as honest/clumsy as Miley is.
Love them!